The first step is to get all your materials ready. For me this was pouring out multitudes of sprinkles without having them all end up scattered on the floor and then adhering to my feet.

Well, probably a better first step would be to bake off your cookies. Here they are stacked up and waiting to get their icing and sprinkles put on them. The amount here is about a double batch of my mom's recipe minus the dough at the end of the batch that got to stiff from flour and ended up as cooked blobs of frustration.
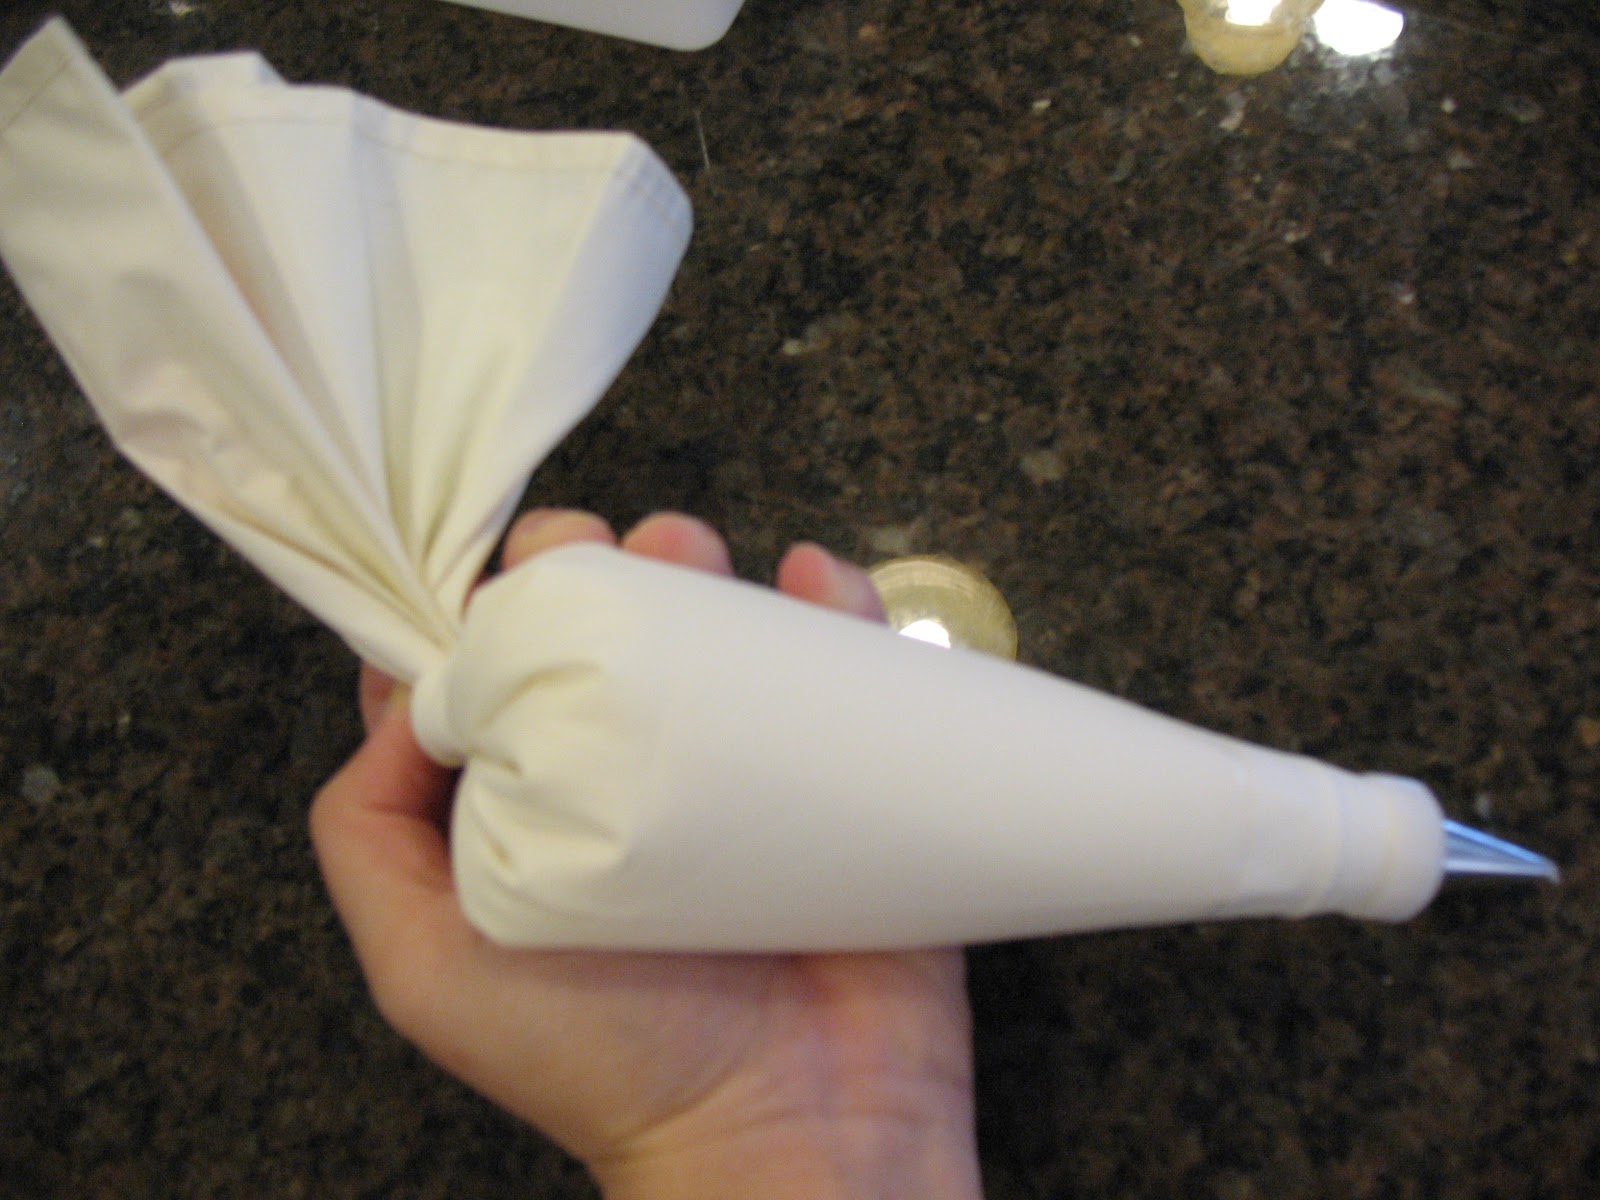
The next step is to get your frosting ready. The type I used is roughly 1 stick of butter, 1 lb. of powdered sugar, 1 tsp. vanilla extract, and just enough milk to keep it creamy. I put it in this baker's icing bag, because it makes it easier if you decide to do any fancier decorations and gives you more control. The main trick to it is to keep the end twisted, or you'll have frosting coming out all over your hands and arms and you're mom's holiday frustration level will go up another notch. If you don't think you have the ability to keep it twisted, a rubberband around the end can help. Also, if you squeeze from the twisted side, you have a lower chance of losing all your icing.

Next pick out your cookie. I started with this shape. Can you tell what it is already? No? Well, it isn't an oddly shaped fish, or at least I'm choosing to decorate it as something other than an oddly shaped fish.

Since we're dipping the cookies in sprinkles, you want to do all areas that will be the same color at the same time. It also isn't important to have a full cover in the areas like you see in the picture. When you press the cookie into the sprinkles, it will flatten and spread, so you need just enough to flatten or spread.

Here it goes into the red sprinkles.

At this point he's starting to look like Santa Claus.

Next I'm adding frosting for his bag of toys and his boots which will be the same color.

There we go. Now he just needs some finishing touches in white icing.

This is where the piping bag comes in really handy. I made loops on him, and also dots for his beard. This adds a little bit of texture to the cookie. I also gave him a sprinkle eyeball.

Here's a comparison of the start and the finish of one Santa Claus.

Once you get a hang of the basics, you can try different decorations. You can keep some things the same, make other's different. The limit is your imagination. Well, another limit would be your frustration with your piping skills, but practice will always make those better.

Here's some examples of how to try different things to the same cookie. You can make it more plain like the lower right hand cookie, or you can add cinnamon candies, dip it in another sprinkle to mimic the candies, or add a multitude of tiny pearl sprinkles that prefer to stick to your fingers, not the cookie. The trick is to always add icing before applying anything, because it is the glue that will hold it to the cookie.

Here's my candlesticks, candy canes (or fancy letter J) and tiny boots.

Here's a look at all my Santas and wreaths. I personally like my pimp of a Santa in his gold suit, but that's just me.

I don't know why, but all my angels usually come out looking weird. I've been decorating these shapes since I was around six years old and with many different attempts, I still can't make that angel look any better than this. Also, there all holly leaves here. I added the veins of the plant to make it look a bit different.

I like decorating the trees, because you can always put a base green layer on and then decorate them like you were decorating a real tree (sort of). I decided to go just with "garlands" and maybe you could consider the multicolored sprinkles lights. You can also add candy cinnamon pieces to be "ornaments."

Toy soldiers are fun to try to make them look like they are part of a real military branch. These ones don't. I did make a "camo" soldier, but his legs snapped off and I had to eat him.

Gingerbread houses, bears, and reindeer. I will admit at this point I was about five hours into decorating and I stopped caring as much how they looked. That's why there isn't too much variation in design.

On the right are what are supposed to be drums with drumsticks. Or maybe the underside of sleighs? I'm not sure, but they have come to be know as Christmas hotdogs to my family.

The trains and the gingerbread men were done at the point when I just wanted to be finished, so they got the easiest decorating design of a basic outline.

How did these get in here? ;-)

Bells.

Unfortunately for the snowmen, I was past wanting to be done and my back was hurting from hunching over the table. I usually do a more intricate design like the snowman in the red scarf, but my tiredness and the almost all gone frosting meant these guys were going to look a bit sad.
The final thing to finish these guys is to make sure that the frosting dries or hardens before you try to stack them. That's why I have them on cookie sheets to increase the amount of places I could store them while they dried. Also, a personal recommendation is to get your friends and family to come help you so you don't end up in a weird place after seven hours of decorating cookies where you are yelling at inanimate food objects for not listening to you while your body and house is covered in tiny sugar sprinkles. However, this may also be attributed to eating too many of the cookies and skipping dinner, so your blood sugar levels are way too high.