Thursday, May 19, 2011

Pirate Party Compete with Ship, Desert Island, and Booty

For two of my friends' combined birthday party, they decided to throw a pirate themed party.  I took this as a challenge to make as neat of a cake as I could to appease some pirates when the rum was gone (the rum is always gone).  Overall, I think it came out well, but I ran short on time with my pirate ship and didn't have time to put all the details that I wanted to on it.


I started out making a bundt cake for my island.  I decided on this both for its shape, but also to try to make a studier material for the palm tree to stick out of since we've had problems with that in the past.


We ended up filling the center with a couple cupcakes.


I sprayed blue food color mist around the bottom of the cake to act as the ocean.


I covered the cake with a mixture of brown and white sugar to give the appearance of sand.  I didn't break up any chunks of brown sugar to help give the appearance of rocks.


While I worked on the cake, my trusty cake making buddy John worked on making a sugar palm tree.


We made the trunk around a skewer to add some support and make it easier to add to the cake.  We dyed the trunk brown and the leaves green.  We used toothpicks to apply the color to the leaves which also helped add texture to the sugar as it cooled.


John used extra heated sugar and his roommate's compressed air (intended for computer keyboards) to cool the sugar quickly to help the leaves stick faster.
(We told no one to eat the tree if they had a latex allergy after using latex gloves)


Here is how the tree looks on its island.  We also made a coconut out of leftover sugar to add an extra little detail


I got started on the ship.  It took quite a bit of cake to complete and, since I use box mixes, you can see that I ran out of chocolate and had to use a different flavor.


I carved the front of the ship and added to the top.  It was at this point that I was tired of dealing with cake and frosting, so I convinced John to frost the cake with some nice chocolate frosting.


John had been working on a treasure chest, so I took over with his work when he started to make the frosting.


We thought it would be a good idea to try to incorporate a threadless design into the cake, so we made some "Booty"
http://www.threadless.com/product/2637/Booty/tab,guys/style,shirt


We put the treasure chest on the desert island.  Yes, it is in plain view and not buried where X marks the spot, but it's difficult to bury a cake treasure chest in another cake.


Booty.  Enough said.


It was at this point that I ran out of time.  Our island was finished, but the ship was missing a lot of details like a mast, wheel, anchor, pirates, and it isn't even in water.


When I returned for the party, I added a mast made out of a pirouette cookie and some fruit leather.  I also happened to have a plastic pirate that I added to the cake.  I need to stop procrastinating my cakes if I want to keep making them intricate.  However, I happen to really like the island.  ARG!


Sunday, April 17, 2011

A Sad Kangaroo Leaves America

At the beginning of this school year, I met an awesome Australian exchange student named Caspar.  Now, unfortunately, is his time to go back to that strange land with it's weird animals.  I promised to make him a cake before he left, so, in order to commemorate his return back to his homeland, I made, with the help of my friend John, a sad kangaroo holding an American flag.  It took us a total of six hours to make the cake, but that was partially due to us only having one 8 inch round cake pan to bake all of four cakes.


Here's the all put together kangaroo at the going away party crying and holding it's American flag.
It was received with amazement by my Australian friend who will be missed by all of us Americans.


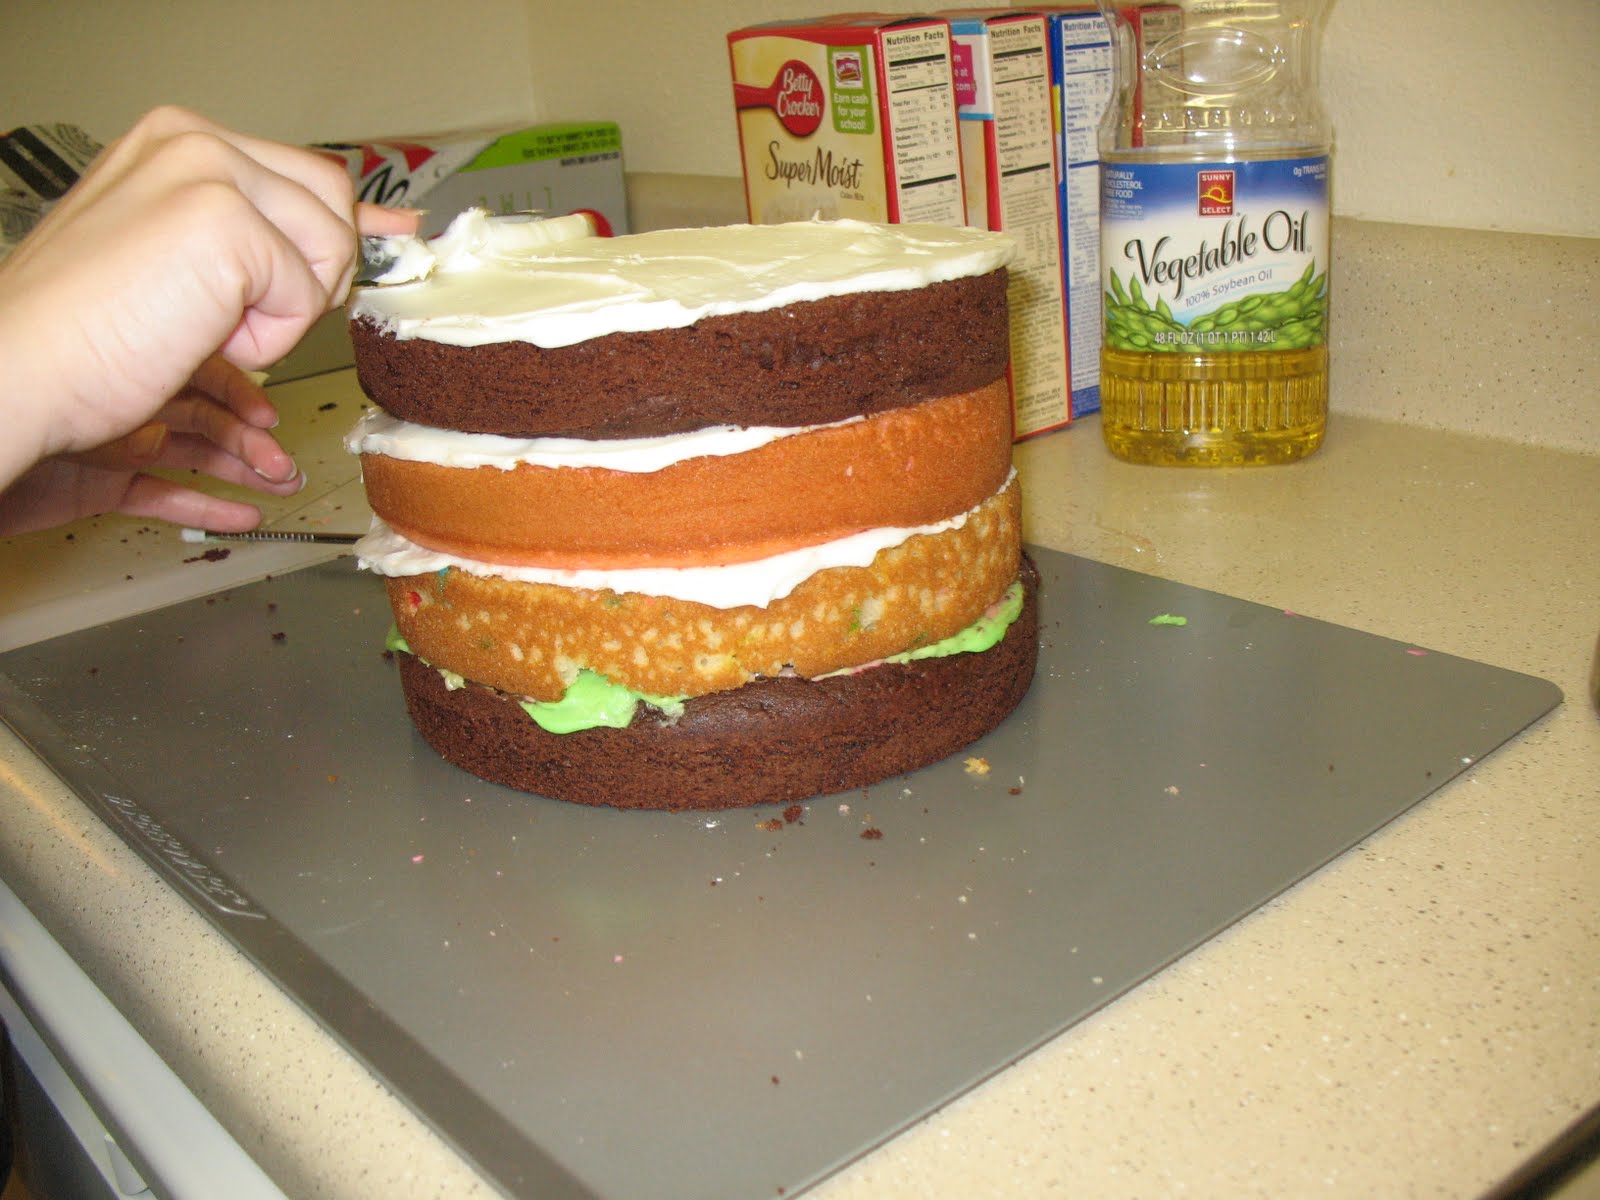
 We started by leveling all the cakes and then started stacking.


We used a combination of vanilla and almond frostings to frost the all cakes.  


As you can see, we used a mixture of cake types including chocolate, funfetti, and strawberry to make it neapolitan.  The colored frosting is from another project that I made while waiting for all the cake to bake off.


Next I started carving out the shape of the kangaroo.


Next we made legs, a tail, and the head and neck out of rice krispie treats.


Next we frosted the body.  We didn't have enough table room to roll out enough fondant to cover the entire cake with head on, so we covered this part, and then the top and patched them together.


We had some trouble keeping the head standing up, but after adding more internal support, the head successfully stayed up without the supporting stick you see.  The baby joey was made out of pure fondant.  Note, brown is a difficult color to achieve from white fondant and requires copious amounts of food dye only to have it look like a giant pile of...well, you know.


Here is a back view.


Friday, March 18, 2011

An Apple a Day

An apple a day keeps the doctor away, and finals blues away, and not having it be your birthday yet blues.  For my friend's birthday, I made her some apple looking cupcakes (design courtesy of What's New Cupcake?).  Interestingly enough, she was sick, so I had a hard time getting them to her.  I started by just making chocolate cupcakes using a box mix.  Next I made homemade frosting and dyed it red, or as close to red as I could get which was more like a darker pink.


Can you spot the real apple?


I had some trouble with the methods described in the What's New Cupcake? book, so I just cut a hole in the top of the cupcake and frosted over it.


Here's a side view of the cupcake.


Next I dipped the cupcakes in red sprinkles to evenly coat all the frosted area.


And then it looks just like this.


This next step is pretty difficult, or at least it was when I was showing my boyfriend how to do it:
Step one: get a tootsie roll
Step two: throw tootsie roll on the ground (as this happened accidentally)
Step three: get a new tootsie roll
Step four: pull the tootsie roll in half
Step five: shape one half of the tootsie roll into an apple stem
My boyfriend questioned the waste involved in throwing the first tootsie roll on the ground.  You can skip that step if you have more skill than me at pulling the tootsie rolls apart

The last step would be to add a leaf using green tootsie roll to some of the cupcakes.

Wednesday, February 23, 2011

Meta Cupcakes

It's already late February and way past time that I've updated this blog.  Unfortunately, one of the reasons I haven't updated is because I haven't made anything recently.  My plans to make Valentine's day cupcakes were foiled by a host of midterms and lab reports and other un-fun projects.  Also, the only birthday during this month that I had a chance to celebrate was my own, and, well, it kind of sucks to make your own birthday cake.  So, instead of posting something new that I've made, I'm going to post my super secret birthday cake surprise that my friends made for me.  They couldn't decide on what type of cake to make me, so instead they made cupcakes with miniature meta designs of cakes that I've made on top.  The designs are made of food dyed almond paste (yummy!).  It took me a little while to figure out which cake they all referred to, so as a fun game, see if you can guess which cupcake stands for what cake.  I'll post the answers at the bottom of the blog.

Number 1

Number 2

Number 3

Number 4

Number 5

Number 6

Number 7

Number 8 (two in the middle)
Number 9 (one on the right)

Number 10 (the one not seen in any other pictures above)

That is all the cupcakes so, make your guesses now.  I'll add some more photos and then put the answers at the end for you all to check.


The answers:
Number 1: Cakes from the past: part 1, owls!
Number 2: Shark Attack and Ocean Themed cupcakes
Number 3: Cakes from the past: part 3, Adam's dinosaur cake
Number 4: The Golden Snitch
Number 5: Saturn cake
Number 6: Cakes from the past: part 2, the pumpkin patch
Number 7: Travis's Birthday/The Return from Indonesia
Number 8: Mrs. Helgevold's birthday surprise or sunflower cupcakes
Number 9: Alien (to go with Saturn and also the one that took me a while to guess)
Number 10: Threadcakes: The Friendly Narwhal (it's the horn sticking out of the ocean)


Saturday, January 15, 2011

Shark Attack and Ocean Themed Cupcakes

For my friend Shelly's birthday this year, I was going to make her a cake that had a crew theme to it, but being unable to find the right supplies at the store and also waiting until the afternoon of ruined my chances of doing that.  Instead, I chose an ocean theme and went with the "Shark Attack" cupcake from my Hello Cupcake book (which will give you more detailed instructions), since Shelly is a beast in the water just like a great white.


I made blue frosting to cover the cupcakes for the water effect.


I also made some grey frosting for the shark.


I gave the cupcakes texture to make the ocean look choppy.


Next I made the shark out of a Twinkie and put him on top of a cupcake.


I made some life preserves out of powdered doughnuts and fruit roll ups.


On some of the other cupcakes, I added some Swedish fish.  The rest I left blank except for the three I used to write out Happy Birthday Shelly.


Here's a close up of the writing.

Monday, January 10, 2011

Kyle's Christmas Train Cake

For my brother's birthday, I made him a train cake.  He likes trains and was really into them when he was younger and even had a train themed bed room.  He is much older now, but I thought a train would still be a good idea for a cake.


Choo Choo!


I decided to make a chocolate cake with peppermint icing filling.  I started by smashing up some candy canes.


I mixed the candy canes into the frosting.  Just a note, make sure the cake is going to get eaten right away if you want to put candy canes in it and still have the crunch.  they get gooey after a while.


Next I made the cake and cut it into sections for the train.


I layered the cake to make the front of the train and had some extra left over, so I decided to make a coal car to go with it.  I used the peppermint frosting to fill the cake


Next I started frosting the cake with non peppermint frosting.  I also decided to add a cow catcher to the train, which was a nice decorative thought, but really crumbly and a pain to frost.


After I finished frosting it, I added some decorations including a candle for a smoke stack, chocolate wheels and some "santa's coal bubble gum" for the coal in the coal car.


I added some candy canes to give it some extra design and used the crook part of the cane as a way to show how the cars could be connected together.  The cake turned out like this once the smoke stack was lit.  Also, that bottle is root beer.


Here's a look at the inside and you can see how coal like the bubble gum was.